A real-world problem: My customer had a gateway that could log on to two different domains (Domain1 and Domain2). For each domain, there was a Citrix Virtual Apps and Desktops (CVAD) environment. If you log on to Domain1, then you should get connected to CVAD1, if you log on to Domain2, then to CVAD2. There was an additional problem: it was possible that the same user with the same password existed in both domains. Therefore, the logon dialog had to include domain selection.
This is a screenshot from my test environment:
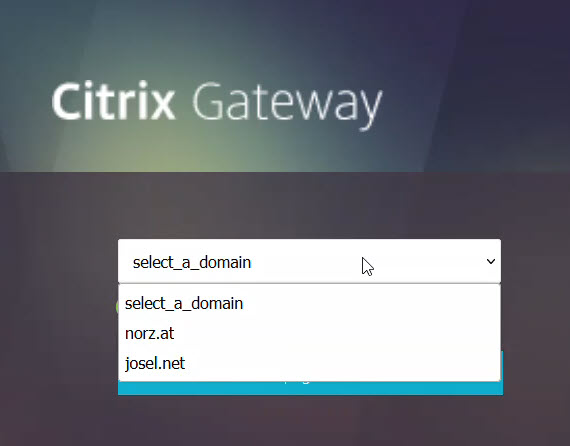 As you can see, the first question is which domain to log on to. Of course, there can be any number of domains in the list. The next step is the actual authentication. Single-factor or multi-factor authentication can be used; of course, this can also be different for each domain.
What the Citrix NetScaler AAA nFactor flow looks like:
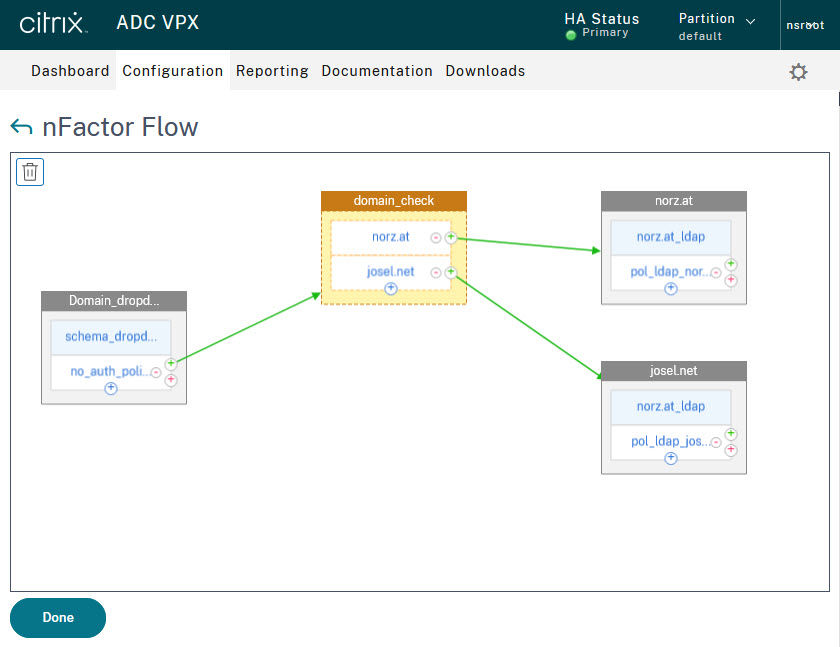 As you can see, there is a first factor that shows a domain dropdown list. The next factor is a so-called decision block. As the name suggests, this is where the decision is made as to which domain to register to. From here it branches to the two domains (norz.at and josel.net). The two third-factors are then normal single-factor authentications. Of course, you could also use a two-factor authentication instead, but for the sake of simplicity, I did not use it in this test environment.
Pre-requisites
Before we start designing the Citrix NetScaler nFactor flow we need to create and test all the required authentication policies.
There is a problem with the two LDAP policies: we need to know later to which policy the user has logged in. It would be nice if we could determine this via group memberships, but this is often not possible. In fact, at my customer’s site, both domains shared the same group names. How should we then bind the session policies?
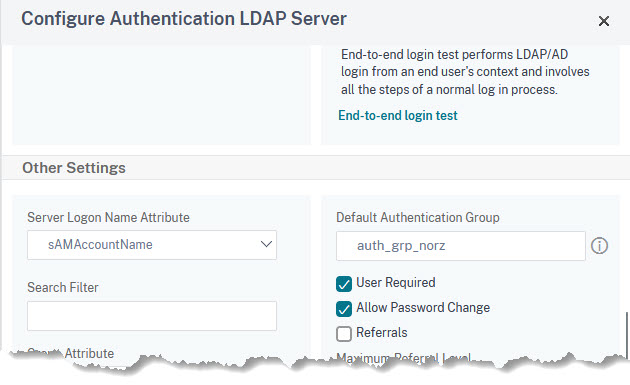
To solve this problem there are the so-called default authentication groups in each authentication policy. In the authentication policy, it is simply a text that is there. In NetScaler you have to create a local group with the same name as the default authentication group (case sensitive!). See here.
 In Parallel, we have to create a group in Citrix NetScaler ADC with the exact same name. Go to Security → AAA-Application Traffic → Groups and create a new group:
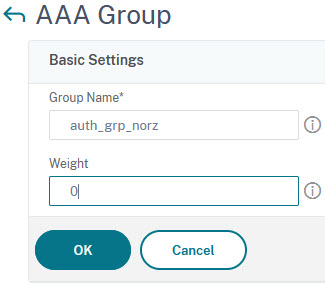 Give this group a name.
![]() Atention: The name of this groups must not correspond to any existing groups in any of these domains!
Atention: The name of this groups must not correspond to any existing groups in any of these domains!
Creating the Citrix NetScaler nFactor flow
Go to Security → AAA-Application Traffic → nFactor Visualizer → nFactor Flows. Click add.
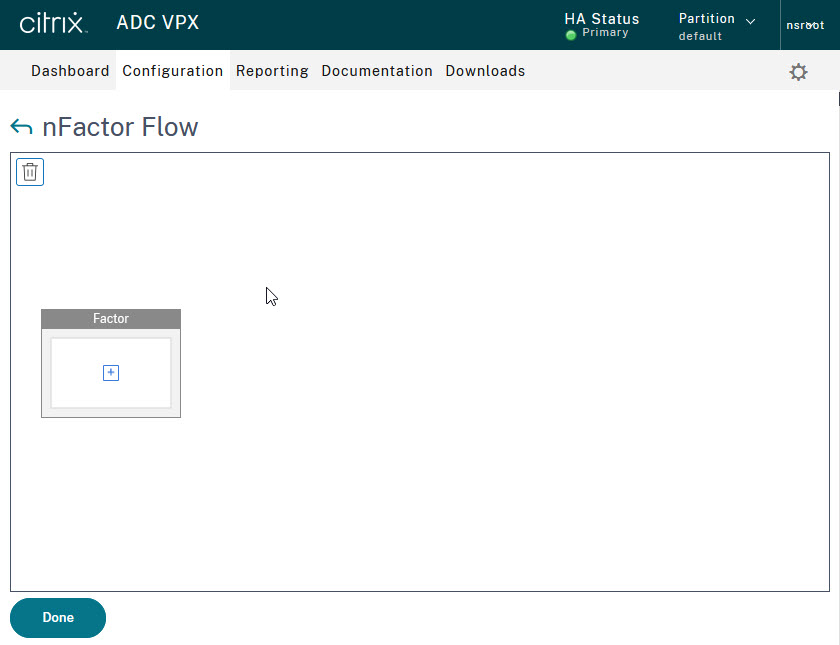 Click the plus sign in this first factor to create the factor.
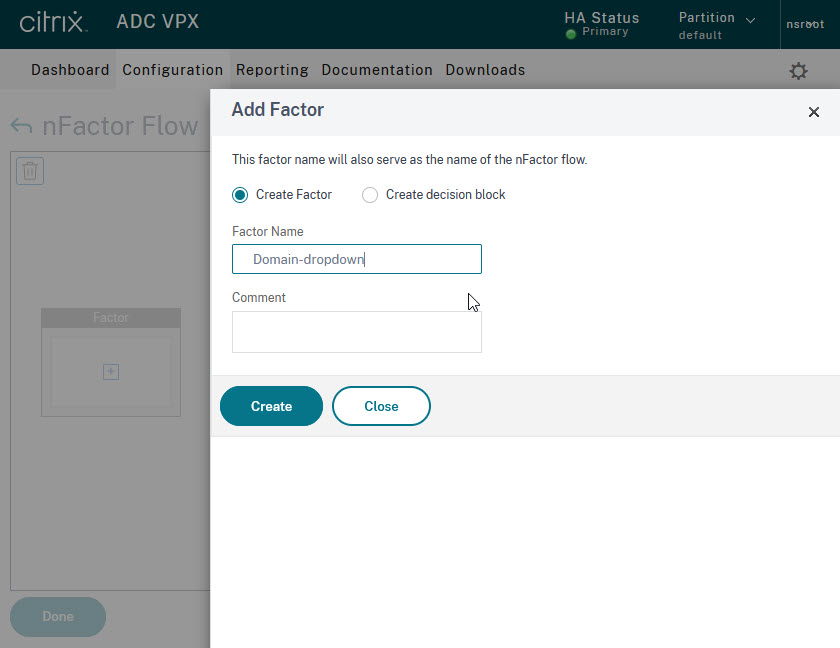
Give this factor a name and click Create
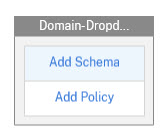
A factor always consists of
- a Schema, defining the layout of this factor. (Decision blocks don’t contain a schema)
- one or more policies defining the behavior of this factor.
Click Add Schema.
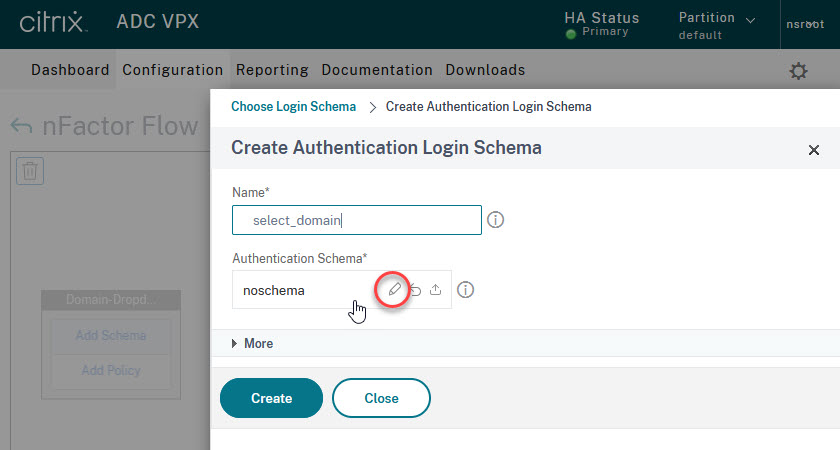 Give this schema a name and click the pen icon next to noschema.
 I think things get confusing from here. Si try to follow my guidelines as close as any possible.
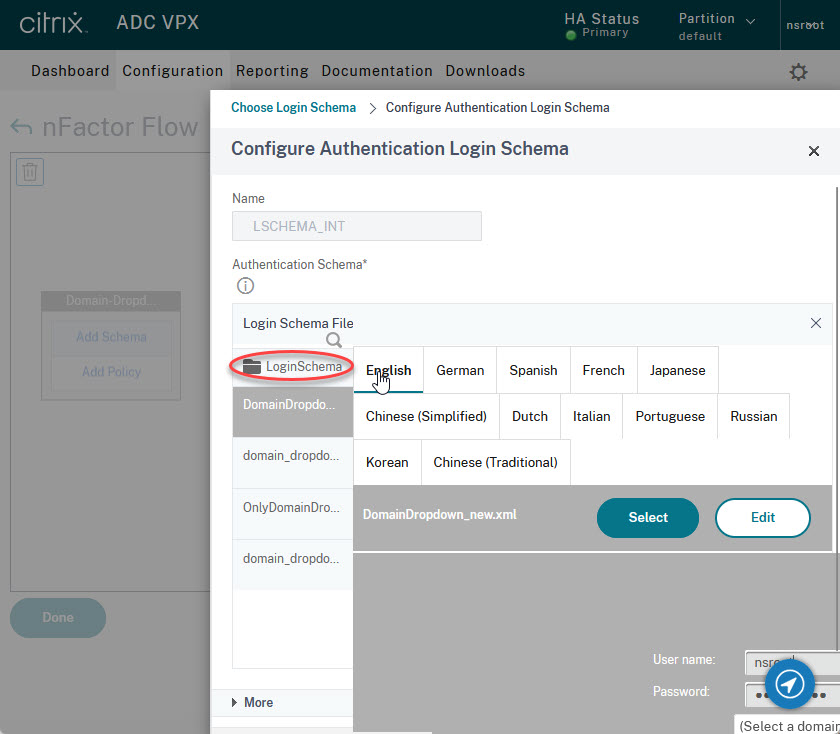
Here you can see all the schemes you have already created (in many cases the list will be empty). Click on LoginSchema.
 Now all the schema templates that Citrix has included with their NetScaler are displayed.
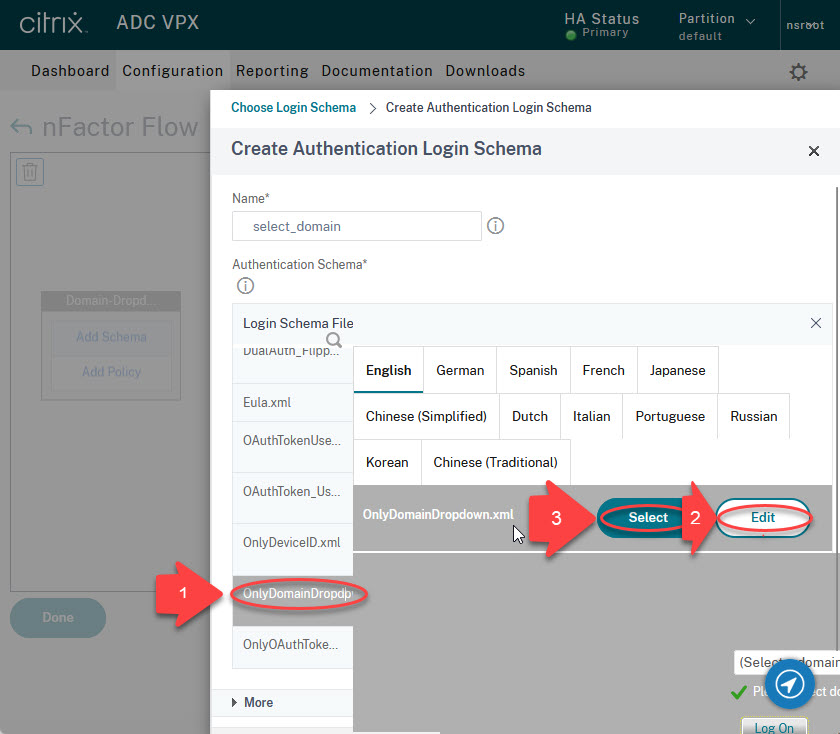
- Select the OnlyDomainDropdown scheme.
- Edit this schema, so it reflects your needs (i.e.: add your domain names)
- click select.
 Caution. Your scheme will be discarded if you do not press select!
Unfortunately, editing the domain list very often does not work. Schemas are XML files. They can be found in /nsconfig/loginschema. In most cases we will have no choice but to edit the XML file with an editor.
My XML file looks like this:
<?xml version="1.0" encoding="UTF-8"?>

<AuthenticateResponse xmlns="http://citrix.com/authentication/response/1">

<Status>success</Status>

<Result>more-info</Result>

<StateContext/>

<AuthenticationRequirements>

<PostBack>/nf/auth/doAuthentication.do</PostBack>

<CancelPostBack>/nf/auth/doLogoff.do</CancelPostBack>

<CancelButtonText>Cancel</CancelButtonText>

<Requirements>

<Requirement><Credential><ID>domain</ID><Type>none</Type></Credential><Label><Type>none</Type></Label><Input><ComboBox><InitialSelection>unspecified</InitialSelection><DisplayValues><DisplayValue><Display>select_a_domain</Display><Value>unspecified</Value></DisplayValue><DisplayValue><Display>norz.at</Display><Value>norz</Value></DisplayValue><DisplayValue><Display>josel.net</Display><Value>josel</Value></DisplayValue></DisplayValues></ComboBox></Input></Requirement>

<Requirement><Credential><Type>none</Type></Credential><Label><Text>domain_dropdown2_please_select_domain_to_continue_login_...</Text><Type>nsg_confirmation</Type></Label><Input/></Requirement>

<Requirement><Credential><ID>loginBtn</ID><Type>none</Type></Credential><Label><Type>none</Type></Label><Input><Button>domain_dropdown2_log_on</Button></Input></Requirement>

</Requirements>

</AuthenticationRequirements>

</AuthenticateResponse></AuthenticateResponse>
The list of domains is in the <DisplayValues>section. Each DisplayValue has a <Display> and a <Value> entry. Display is, what users can see, Value is what the Citrix NetScaler will see (and our respective policies).
In addition, there is a default value. It’s specified in the InitialSelection area. It defines a default domain. Unspecified means, no domain pre-selected. If I would like to pre-select the norz.at domain, I would remove the <DisplayValue><Display>select_a_domain</Display><Value>unspecified</Value></DisplayValue> part and add norz.at into the (red) InitialSelection tag.
 You have now assigned a schema to your factor, now we need a policy. Click on Add Policy.
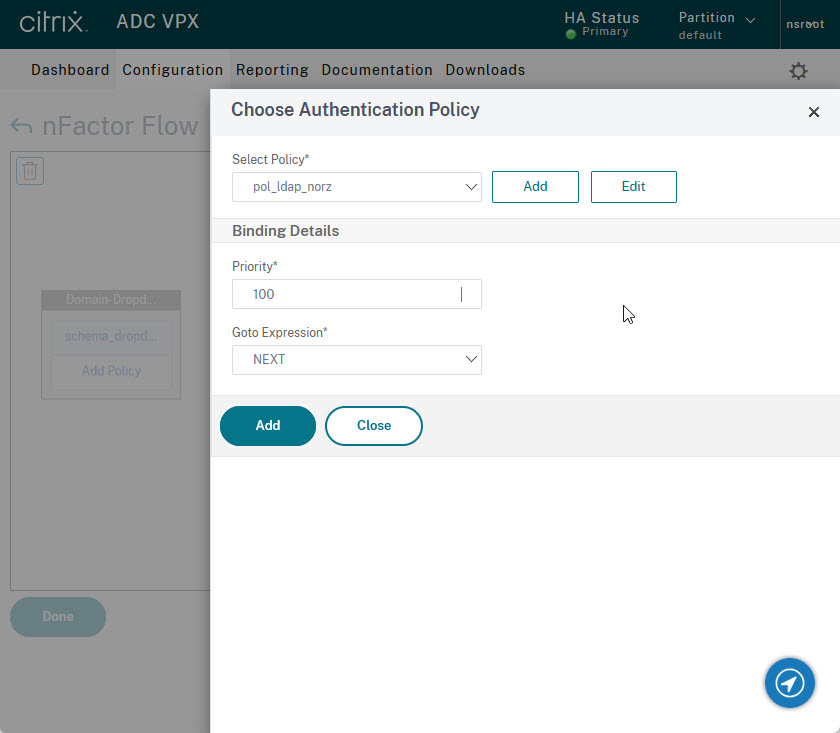 Click Add to create a new policy.

This policy is not to do anything. Therefore I named it “no_auth_policy”. It should, accordingly, be of type NO_AUTHN. The expression will be a simple true.
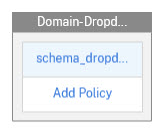
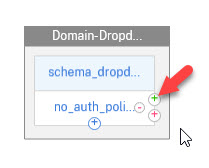 We are done with this first factor. Let’s have a look at it.
Above, in light blue, we see our scheme. Below that in white we see all the bound policies, in this case there is only one. Below the policy there is a blue plus sign to add more policies. The green plus sign next to that policy calls the next factor if that policy was processed successfully. The red plus calls a factor if this policy was not successful.
Of course, there does not need to be a next factor, either in case of success or failure. However, in our case, we need to create a next factor. This factor will be a so-called Decission Block. As the name suggests, these Decision Blocks make decisions, in our case it selects the next login dialog, depending on the domain we selected in the previous factor.
Click the green plus to create the next factor.
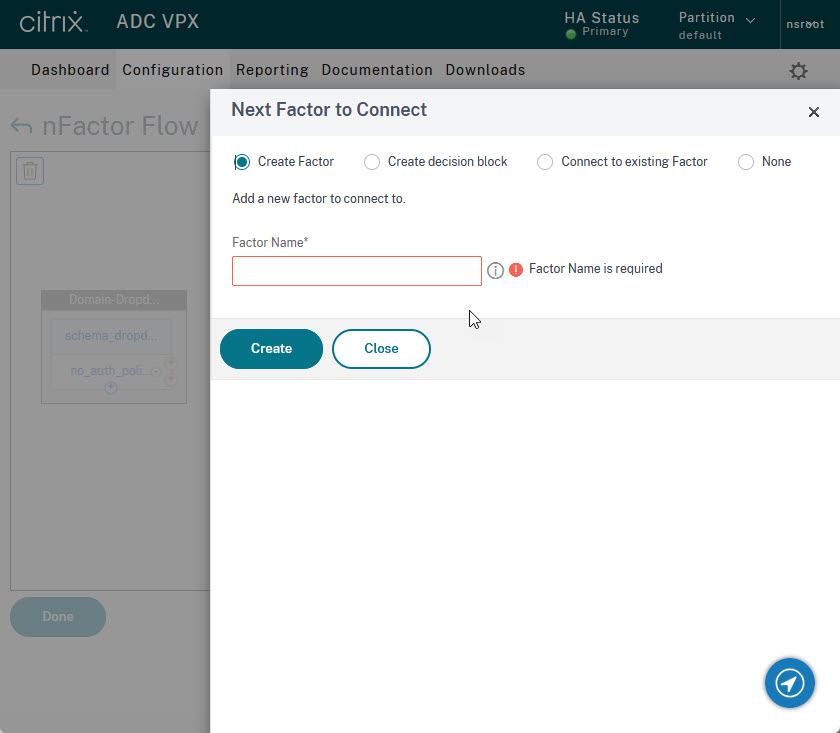
Give this next factor a name and select Decision Block
 Click Create
 This new factor should now be connected to the first factor.
Click Add Policy.
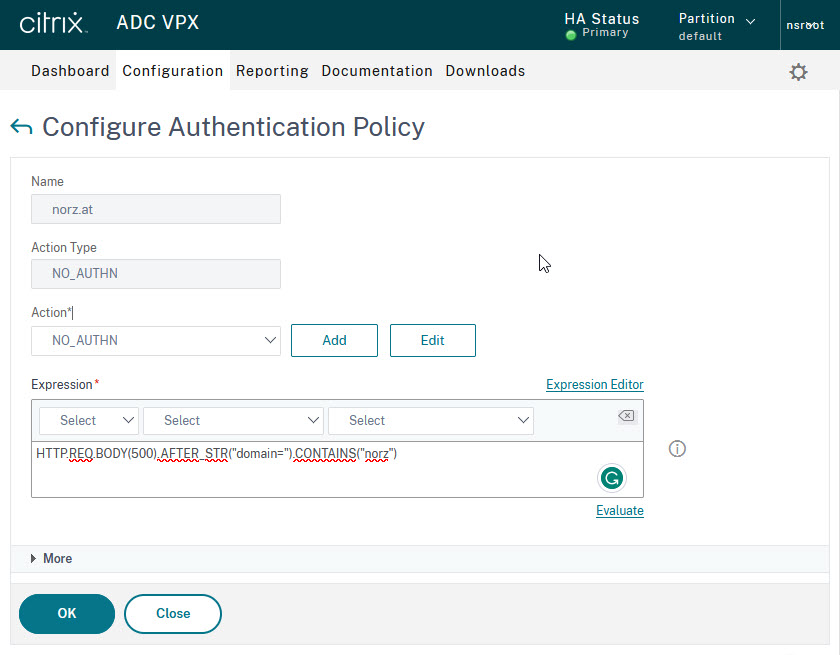
We now need to create the policy that selects the logon dialog for the particular domain. So we need a separate policy for each of our domains.
These policies will again be of type NO_AUTHN. The expressions, however, will be a bit more complicated. We check if the name of the domain appears in the first 500 bytes of the HTTP requests. For example, the expression for a domain named norz would be HTTP.REQ.BODY(500).AFTER_STR("domain=").CONTAINS("norz")
 Create as many policies as needed.
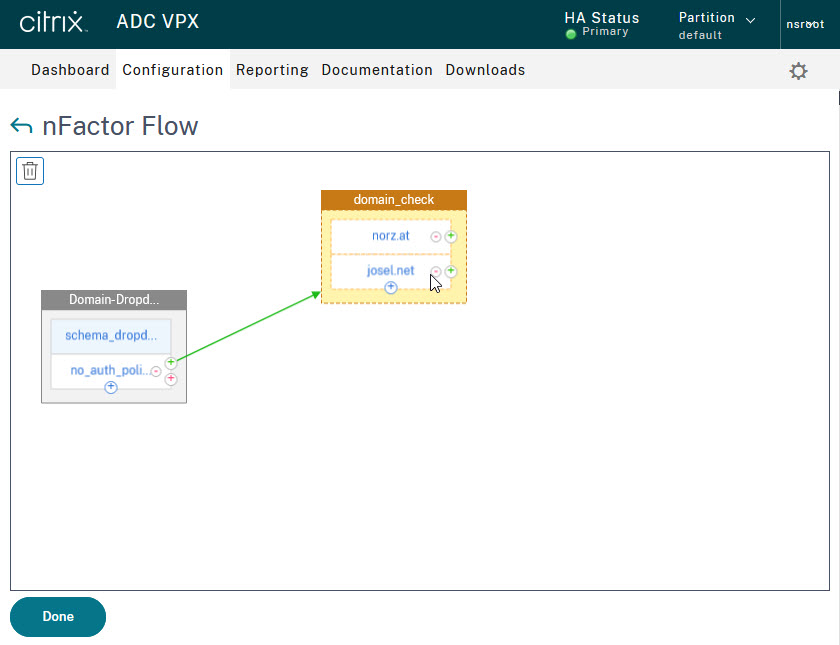 I created 2 of these policies, one for norz.at, and one for josel.net. As you can see, both of them have a green plus sign to bind the next factor to it. These next factors are simple logon dialogues, either single-factor or two-factor. The complete setup will look like that:
 Vitrix NetScaler Gateway Session Policies
The “trick” now is to bind the right session policies. If you log on to norz.at, different session policies should apply than if you log on to josel.net.
This is surprisingly simple. For this purpose, we have created the “Default Authentication Group”.
So we create normal session policies like we always would, but the expression becomes not a simple HTTP.REQ.HEADER("User-Agent").CONTAINS("CitrixReceiver"), but HTTP.REQ.HEADER("User-Agent").CONTAINS("CitrixReceiver") && AAA.USER.GROUPS.CONTAINS("auth_grp_norz")
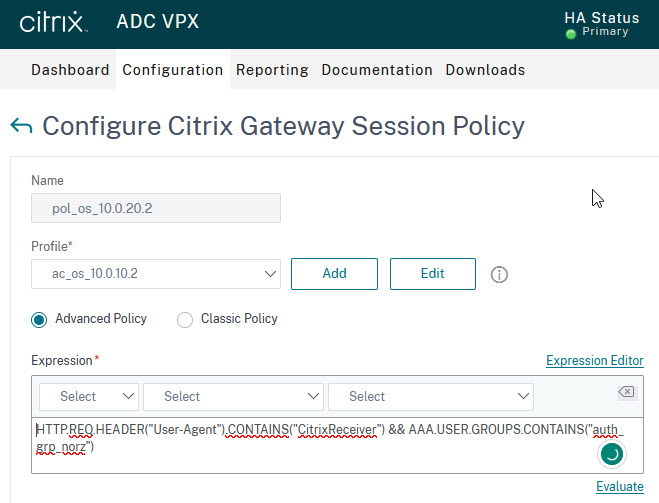 This
This && AAA.USER.GROUPS.CONTAINS("auth_grp_norz") looks into the groups the user belongs to. If HTTP.REQ.HEADER("User-Agent") contains Citrix-Receiver and the list of groups contains auth_grp_norz, then this policy applies. This is the policy for the Citrix Receiver.
The one for the browser would of course be HTTP.REQ.HEADER("User-Agent").CONTAINS("CitrixReceiver").NOT && AAA.USER.GROUPS.CONTAINS("auth_grp_norz")